Sunday, March 15, 2009

GoodSync: Award Winning Backup and Synchronization Solution

1) Securely Back Up all Your Files
GoodSync combines bulletproof reliability with an extremely easy to use interface to back up and synchronize your emails, financial documents, contacts, photos, work files, iTunes, MP3s, and other important files.

2) Back Up to Multiple Devices
Automatically back up and synchronize all files between desktops, laptops, servers, and external drives over a network or the Internet.
3) Easy and Automated
With one click back up all your data, eliminate information clutter, get your files safe and up to date, and most importantly achieve complete peace of mind.

WHO Should Use GoodSyc?
Anyone who:
• Is worried about losing important files
• Has experienced a computer crash in the past
• Would like peace of mind
• Wants an EASY, yet ROBUST synchronization solution
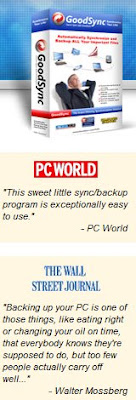
How GoodSync Works? See GoodSync Review.

Tuesday, March 10, 2009

How to Upgrade Hard Disk Drive?

Well, upgrading the Hard Disk Disk Drive capacity can be done in different options:

1) Replacing your Hard Disk Drive to a bigger storage capacity 250GB~max available), but you need to back-up or save your files in order to transfer them to the new one.

2) Some units have the expandable features, where you can add Hard Disk Drive without removing the existing one. Usually you can see an extra slot in the casing for additional drives.

3) Buying External Disk Drive with even much bigger capacity, and not having to remove your exisiting files.

It will then depend to your preference, but if I am to choose, I'd opt for the External Disk Drive, since it would also offer great flexibility and hassle in installation coz it's just a plug and play function. But then, if you prefer to replace the existing to a new one, you need to follow carefully the installation steps provided by the brand's customer support. Example, for HP Pavilion a1010n Desktop PC, the steps are clearly provided in this link : HP Pavilion a1010n or download the .pdf file at this link: HP Pavilion a1010n HDD Upgrade.

Saturday, March 7, 2009

How to mute audio of a Video Clip in Vista Movie Maker

To mute audio of a Video Clip, do the following:

1) Drag the Clip to the "Audio/Music" track of the Timeline, Right-click the Clip and choose Mute.

2) Drag back the Clip to "Video" track so you can still view the Clip without the audio.


Friday, March 6, 2009

How to Reduce File Size of Picture/Image files (Bitmap & PNG file types) Without Reducing Image Size:

Reducing file size of pictures/image files is needed in uploading activities that require file size limits and even when saving downloaded pictures/images from High resolution digital cameras.

First, determine your picture/image file type – Bitmap (.bmp) & PNG (.png). You can verify this by browsing to your picture/photo files. If your default files do not show the .bmp, .jpg or .png strings as shown in the sample below,

 
(click image to magnify)

then, do the following:

a. Right-Click the file and Left-Click to choose Properties.
b. Check the file type as shown below:

 
(click image to magnigfy)

Reducing File Type Size without Reducing the Image Size:

a. Right-Click the file, go to Open With option, Left-Click to choose Paint (see sample below).

 
(click image to magnify)

b. In Paint environment: click File at Menu Tab --> click Save As –> Choose “JPEG” at the “Saves As Type” drop down list –> browse the location to save the reduce file – Click Save (see sample below) .

 
(click image to magnify)

Take note that the above steps is only to reduce file size by converting .bmp and .png files to .jpg file type, without reducing the image size.  If your image/photo size is too big, then, you might as well just reduce the image/photo size first, before reducing the file size as described in the above procedure.

This article's sponsors:
Corel Paint Shop Pro Photo X2 Ultimate Photo Explosion Deluxe 4.0 Photostudio Expressions Deluxe Version 3.0

Monday, March 2, 2009

Getting Your IP Address in Vista Environment

1. Click START button, then, type RUN and hit ENTER.
(see sample here)

2. Type "cmd" in the Run window, then hit ENTER.
(see sample here)

3. Type "ipconfig" in the cmd.exe window, then hit ENTER.
(see sample here)

4. In the cmd.exe window, the Network Connection details will then be shown including your IP Address. In my case, are the Wireless Network Connections details, since we are 6 in our networkconnection at home.
(see sample here)

Thanks for the visit!
email me: youronlinehelp@rocketmail.com or post your comment here for more inquiries.